A wife of noble character who can find? She is worth far more than rubies. Her husband has full confidence in her and lacks nothing of value. Charm is deceptive, and beauty is fleeting; but a woman who fears the LORD is to be praised.

-Proverbs 31:10-11,30
Showing posts with label food. Show all posts

Wednesday, September 28, 2011

Guess what....

We have a new little addition to our family!

Um... no, it's not a baby...
or a dog..

It's a CROCK POT!!!!

And I am so, so, so excited! 

Do you want to know what I made in it over the weekend? Of course you do!

I made 2 batches of applesauce, 1 batch of apple cider, and refried beans! It was a super treat because none of these items are available in Korea!!! (And I am dying, because apple cider is a MUST for fall)

So, if you live in Korea, you should either buy a crock pot or come to my house and I'll make you food : )

If you have a crock pot, let me tell you what I did. 

The applesauce was SUPER easy. I peeled and cut up the apples, cooked them on high for 3 hours, and mashed and stirred them with a whisk. 

I did the same thing with the refried beans, only I covered them in 3 inches of water and cooked them for 6 hours.

The apple cider was a little more difficult. I prepared the apples just like the applesauce. Then I took some cheesecloth, a big wooden spoon, and a sieve and squeezed the juice out of the mushed apples... It took me a while to figure out a good method, so if you attempt, just keep working on it!  

Wednesday, September 7, 2011

Zucchini Bread


In the toaster oven!!!
I tried making two kinds. The recipe I tried was this Blueberry Zucchini Bread from Allrecipes.com. The first pan I used blueberries... it did not turn out so good. The bread was really soggy and didn't rise right. I ate that one. 


The second pan (in the front) turned out PERFECT!!!! I had been craving a good zucchini bread and this one was awesome. I took the pan to my teachers at school and they loved it! 

Just as two interesting cultural side notes, once my teachers tried it they called it "cake" not bread and the word for zucchini in Korean translates as "small pumpkin". The same word is used for all squashes and pumpkins regardless of variety. 


Thanks for stopping by! 
What yummy and creative things have you made lately? 

Tuesday, August 16, 2011

Frozen Bananas and Kidos

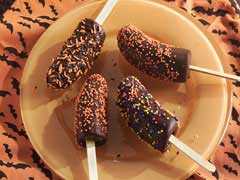
Last Friday was cooking day for my summer camp. This year I decided to make Chocolate Covered Frozen Bananas with my (camp) kids. 
I really love teaching kids to cook. Even if it's not something crazy exciting or complicated, I love to see the satisfaction a kid has from eating food they made themselves.  


First we melted the chocolate.


Then we added some springkles.


Or some nuts.


Put them in the freezer for a little while. and Presto!
Yummy bananas!


The kids couldn't remember the word "frozen" so they kept calling it "icecream bananas". Close enough : )
It was the first time any of them had eaten this treat. It was perfect for a hot summer day.
Here is my awesome co-teacher enjoying one too : )


And some of my kids eating theirs.
They really liked them!


Now go make some food with a kid!

Monday, June 27, 2011

Brownie Search Complete!

I realized that I never posted about my completed brownie search! Not long after this post where I turned some brownies into cake, my friend sent me an amazing brownie recipe. It is very perfect : )  

Unfortunately, I don't have pictures with me now, but I thought I would share the recipe with you. It doesn't make the thick gooey brownies that I usually get from a box mix (I think because the size of my pan makes them just a little too tall), but they make up for it in deliciousness! 


A-mazing Brownies
1 C butter
1 C cocoa
2 C sugar
4 eggs
1 tsp vanilla
1 C flour
1/4 tsp Baking powder
1/4 tsp salt
In microwave, melt butter.
Add sugar and cocoa until well incorporated. (let cool just a bit before adding eggs so they don't scramble!;)
Add remaining ingredients and stir until fully incorporated.
Pour into greases glass dish.
Bake at 350 degrees F or 176 degrees C for 25-30 minutes. Insert toothpick or chopstick to check for doneness. If browning starts to occur early, just cover with foil and keep baking! :) 

Note: I use a half recipe for my pan size. Baking in my toaster oven, I always cover everything with aluminum foil from the beginning. If I want the top to be a little crunchy, I take the foil off for the last 5 minutes of cooking. I also can't control the temperature in my oven, but it works just fine. 

Happy eating!

Friday, June 17, 2011

Chipotle Chicken Salad

2 things I really miss from home. Mexican food and home made sandwiches. : (

Last night my hubbs and I got to have some of both (ok, maybe it isn't really Mexican... but hey.. we are in Korea.) Again, my pictures are bad because I'm lazy. 
But can you see this deliciousness!!!! 

And this beautiful red tomato?


And the resulting sandwich?


And I bet you're thinking "Katelyn, please, I'm on my knees begging you to tell me how to make this sandwich!" 

Ok, if you insist. 

I actually found a recipe for Chipotle Chicken Salad on allrecipes.com but I didn't like the recipe too much. So I made my own : )

You'll need:
-3 or 4 cooked chicken breasts- shredded (I used 4 and we had extra)
-Celery, broccoli, peppers, carrots, shredded cabbage, or anything else that sounds yummy to put in the mix finely diced. (We had some broccoli, but next time I'm gonna put in some sweet red peppers and cabbage) 
-1 single serving "sour cream" (plain yogurt) 
- about a 1/2C mayonnaise 
-Salt, pepper, garlic powder, onion powder to taste
-1/2 teaspoon chili powder (Korean or american)
Directions
1. Mix together shredded chicken and diced veggies. Add "sour cream" and mix. 
2. Add in mayo 2 or 3 tablespoons at a time. Mix until you like the consistency. 
3. Add in chili powder, salt, pepper, garlic powder, and onion powder. Mix well until all spices are evenly distributed. Taste. 
4. Refrigerate until ready to serve! 

You could totally make this the night before if you have a busy next day and need a quick dinner. Eat it on a wrap, bread, crackers, tortilla chips. 

Saturday, June 4, 2011

Hot Summer, Frozen Banana

Summer is coming! Soon it will be HOT in Korea. I'm trying to think of ways to cool off and eat at the same time. I came across this great idea while planning Cooking Day for my school's summer camp. 


Mom Advice gives some great ways to use this as a dessert, snack, or breakfast food. 
Here is what she recommends:

Chocolate Covered Bananas
6 ripe bananas
1 cup semisweet chocolate chips 

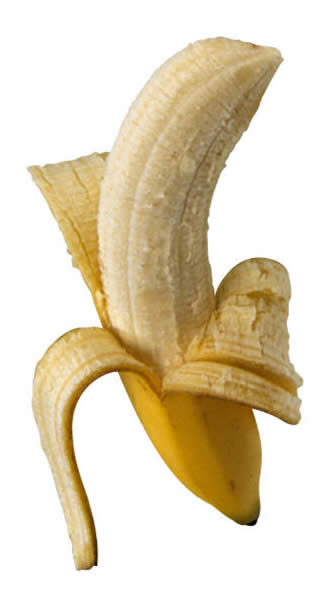
Peel bananas and cut in half crosswise. Insert a wooden stick into the flat end of each banana half. Lay bananas on a shallow pan (I used a small cookie sheet) and freeze for approximately three hours. Melt chocolate chips in the microwave or over hot water. With a spatula, quickly spread melted chocolate over banana, coating well. Then roll in sprinkles, crushed nuts, or rice cereal. Wrap each banana in foil and store in your freezer.

                                Breakfast Banana Pops
4 large bananas 
2 cups fruit-flavored yogurt, Nutella or peanut butter (For easiest spreading, dilute nut butters with enough vanilla or plain yogurt so it’s the consistency of thick cake batter)
1 cup combination of chopped dried fruit, granola, crushed cereal, crushed cookies or crushed candy
Peel the bananas, cut in half crosswise, and dip them in the yogurt. Roll them in the toppings to coat. Freeze until firm. Serve when firm.

Crispy Banana Pops
2 medium bananas 
1/4 cup crisp rice cereal

1/4 cup miniature chocolate chips
2 tablespoons finely chopped peanuts
1 tablespoon light corn syrup
Cut bananas in half and insert a wooden popsicle stick into the cut end of each half. Freeze until firm (about ten minutes). Combine cereal, chocolate chips and peanuts in a shallow bowl, mix well. Uncover frozen bananas and brush with corn syrup. Roll bananas in cereal mixture to cat. Loosely wrap each coated banana with plastic wrap. Store in freezer for about ten minutes or until serving time. Serve frozen.

Thursday, June 2, 2011

I Just Made These!

Don't they look so good?


Oh, you might want to know what they are... they're orea truffles.. I got the recipe here.

Here's the awesome thing though. Instead of just using chocolate to coat the orea/creamcheese inside.. I melted some PEANUTBUTTER with the chocolate. O.M.Goodnes.  It was awesome. You should try it sometime : )

Um.. and I totally used chopstics to coat the insides and moved

Crepes!

My good friend Lindsey over at Ovenless Chef just posted a recipe for crepes!! I've been wanting a good recipe for a very long time. I think this will make my hubby very happy : )


Blueberry Custard Crepes


While you're there, check out her recipe for pancake mix! It's always good to have that on hand : )

Saturday, May 28, 2011

Toaster Oven Potatoes

Ok, so this looks really gross, but imagine this...
Potatoes
Bacon
Cheese.

YUM! 

Next time I need to add more salt though... I live with a saltaholic : )


I'm still having to figure out how to make things crunchy in the toaster oven without burning it since I have to cover everything with foil. I've tried poking holes in the top with a chopstick and I think that helps a little, but not much. I usually take the top off for the last five minutes or so of cooking. 
Any ideas?

Tuesday, May 17, 2011

Skillet Brown Sugar Cookies

Last week I made Lindsey's YUMMY Ginger cookies... except I didn't have any ginger... so they were just brown sugar/cinnamon cookies.

But the hubbs love them so we're all good : )


YUMMY


Sunday, May 15, 2011

Toaster Oven Biscuit Cinnamon Rolls

Don't these look delicious? You can make them in your toaster oven! 


Biscuit
  • 2 cups all-purpose flour

  • 2 1/2 teaspoons baking powder

  • 1 teaspoon white sugar

  • 1/8 teaspoon salt

  • 1/3 cup butter

  • 3/4 cup milk

  • Filling
  • 1/4 cup sugar

  • cinnamon

  • softened butter


  • 1. Combine Flour, baking powder, salt, and sugar. Cut in butter.
    2. Add milk. Stir until combined and kneed for 1 minute. If dough gets sticky, add a tablespoon of flour. Preheat oven.
    3. Roll dough to 1/8inch thick square. Spread softened butter onto dough. Sprinkle sugar over butter. Sprinkle cinnamon over sugar. Begin rolling the from the long side of the rectangle until you have one very long roll. Cut 1/2 to 1 inch sections and place in butter-lined pan.

    4. Cover pan with 2 layers aluminum foil. Bake aproximatly 20 minutes.


    This would be super good with cream cheese icing, powdered sugar icing, or chocolate icing!

    Tuesday, May 10, 2011

    Toaster Oven Coffee Cake

    Since we had the day off for Buddha's birthday today, I wanted to try something new. Just maybe I could make something in my toaster oven.

    Baking is very important to me. Even though we don't eat many baked things (my husband is mostly wheat free), I feel that bringing baked goods to events and giving as gifts is very important.

    Now, my toaster oven is so gross. It's stained, and small, and I scrubbed it for hours when we moved in but it's still covered in black gunk. Yuck. Needless to say, I don't make many things in there. Maybe toast an occasional piece of bread. But, I decided to give it a go anyway. And TADA! It turned out great!


    In the oven (starting to rise)

    Finished!


    So delish!


    Here is what I did:

    I used this recipe from allrecipes, but I cut it in half so that it would fit in my pan.

    1. I covered the tray of my toaster oven with 2 layers of aluminum foil. I don't know if it made a difference, but it's what I did. I was afraid of the bottom getting too hot and burning. I turned on the toaster oven to preheat it.

    2. I used a glass pan that fit perfectly into my toaster oven.

    3. I put some oil in the pan and spread it around with a paper towel to keep the batter from sticking. It worked ok.

    4. Pour the batter into the pan and cover the pan with 2 layers of aluminum foil.

    5. I cooked the coffee cake at 10 minute intervals until it looked light and fluffy through the pan. (It was really cool to watch the cake rise!)

    6. I removed the pan and removed the aluminum foil. The top was a bit spongy, so I put it back in uncovered for 3-4 minutes.


    Note: Each toaster oven is different so you may need to experiment a little to see what works for you! Sometimes I alternate between oven on and oven off to give my food a break from intense heat.

    I can't wait to make more things in my toaster oven! If you make something, would you share it? Leave a comment!

    Wednesday, April 6, 2011

    Microwave Potato Chips

    The things that you can make in your microwave never cease to amaze me.

    A friend of mine recently found this recipe on allrecipes.com, and you make them in your MICROWAVE! I am totally trying this one tonight.
    Potato Chips Recipe
    Picture from Jessica: allrecipes.

    Potato Chips

    Ingredients

    • 1 tablespoon vegetable oil
    • 1 potato, sliced paper thin (peel optional)
    • 1/2 teaspoon salt, or to taste

    Directions

    1. Pour the vegetable oil into a plastic bag (a produce bag works well). Add the potato slices, and shake to coat.
    2. Coat a large dinner plate lightly with oil or cooking spray. Arrange potato slices in a single layer on the dish.
    3. Cook in the microwave for 3 to 5 minutes, or until lightly browned (if not browned, they will not become crisp). Times will vary depending on the power of your microwave. Remove chips from plate, and toss with salt (or other seasonings). Let cool. Repeat process with the remaining potato slices. You will not need to keep oiling the plate.

    Tuesday, April 5, 2011

    Super Easy Dip

    For our church picnic on Sunday, I volunteered to bring veggies and dip. Which was a great idea until it was Satruday afternoon and I realized that there was no ranchish anything at our local mart.

    Too late for Costco, too late for HomePlus. I had to improvise/experiment.

    And it turned out quite delicious i think : )

    I mixed
    1 container flavored cream cheese (onion or garlic, im not sure)
    and
    3 85g containers of plain yogurt.

    Sorry I don't have a picture! The contain was licked clean though, so I guess it was good : )

    Friday, April 1, 2011

    Happy April! I hope you laughed at my crazy post/date mistake yesterday : ) Now you know I'm not always quite together up here *taps forehead*

    Unfortunately my date mix up meant that I didn't have any awesome April Fools jokes prepared for today : (

    I do want to share something that isn't a joke. Pretty much the best website ever!  If you don't know her already, I'd like to introduce you to The Ovenless Chef

    My AWESOME friend Lindsey has a blog about her cooking excursions here in Korea. It is the most amazing blog ever. I seriously think that it got me through the first 6 months of living here!

    There are two reasons this blog is so important.

    1. Most people don't have an oven in Korea!
    Just let that sink in for a minute... and think about all the things you make(d) with your oven. 

    2. Everything is in a different language!!! if you can find it at all. 

    Not only does Lindsey have the most awesome recipes for us ovenless cookers, but she gives you great ideas on what to substitute and where to find certain items.

    This website will change your life. So head over to ovenlesschef.blogspot.com


    PS. I posted a bunch of links to Lindsey's recipes in the Recipe section, with her permission of course!

    Thursday, March 24, 2011

    Guest:Gabi~Potted Plants :)

    This doesn't really count as a tutorial because you can probably deduce what you need to do, just by looking at it :)
    But here is a quick tut anyway...
    What you will need:
    Some flower pots (I used metal because that is what I had, but I think clay/ceramic pots would look AMAZING)
    Cake mix - the recipe I used is here. 
    [Katelyn: If you don't have an oven, try the microwave chocolate cake in paper cups! Decorate them to look like flower pots.]
    Chocolate frosting - I melted about 300g of chocolate and mixed in a few tablespoons of cream, then I let it set (but I left mine a little bit too long)


    Pour your cake mixture into the flower pots and bake them according to the recipe.
    Then pipe out the frosting.
    I originally didn't want to spread the chocolate (as you can see I piped it) BUT because I had left the chocolate to cool for too long it looked a little bit too much like poop:)
    So I spread it out and inserted my paper flowers.
    I must admit I rushed this a little (I really just wanted to eat the cake:), hence the lack of photos, but if you made an effort with the flower decorations you could use this at a garden party/wedding theme.

    :)


    Thanks for sharing all of you ideas with us Gabi! Head over to her website http://bee-inspired.blogspot.com/ to get more great ideas!

    Happy crafting!
    ~Katelyn

    Guest:Gabi~Flowery goodness

    I've always wanted to try this - didn't think I would get it right first time, but TADA!!
    And if I can do it SO CAN YOU :)

      This tutorial is more about the decoration than the cake - but here is where I found my recipe for the chocolate cake. And here is the vanilla frosting recipe.
     I baked two chocolate cakes and left them to cool. (I cut off the tops to make them flat)


    Then I covered them in vanilla frosting, just a thin layer - according to my youtube sources its called a crumb layer. Then I refrigerated the cakes till the frosting hardened.


     Next I covered the cakes in a second layer of frosting - I used this nifty spatula thing which I picked up for super cheap at Homeplus (for those of you in Korea). 


    Then I placed the *pattern that I wanted on my cake (which I had fitted to my cake before I covered it in frosting) on the table. I put down a large layer of wax paper. AND then a second layer of wax paper which is also the same size as the cake (I taped all of this to the table). 


    Then I melted the chocolate and used this plastic thing that I also found at Homeplus, but I think a ziplock bag with a snipped off corner might have worked better.


    As you can see it doesn't look exactly like the original pattern, but I expected a WAY worse end product.


    It dries quite quickly so you need to make sure that you pipe the chocolate out quickly. When it is very close to setting, but still slightly soft - you should pick it up and wrap it around the cake. 
    Judging when the chocolate was ready was probably the most difficult part of this experiment. NB TIP: if you leave edges on your wax paper (about 3cm on the left and right sides) it makes it easier to pick up. 


     I peeled off the wax paper super carefully. 
    And decorated it with some strawberries we had.


     Mission complete - WHOOP WHOOP! 
    This might be easy for the general baking public, BUT it was a massive achievement for me. 
    You can do it too - and if you do, please send me photos of your marvelous creations!


    *by the way, for the pattern - I found a picture of a lampshade with this pattern on, enlarged it, printed it and photocopied it a few times, taped it together and cut it to size (find a pattern that you like and go for it!)

    Tuesday, March 15, 2011

    EASY Chocolate Microwave Cake

    This cake is easy, delicious, and vegan! I modified the original recipe to fit what I had on hand, and it works great!

    3/4 C flour
    3/4 C dark brown sugar
    1/4 C cocoa powder
    1/2 tsp baking powder
    1/4 tsp baking soda
    1/4 tsp vanilla
    3/4 C warm water
    1/4 C oil

    Mix dry ingredients.
    Add wet ingredients.

    Pour into mug, bowl, paper cup, etc and microwave.
    ~1.5 minutes for mug
    ~3 minutes for bowl

    Serve with ice cream on warm cake!

    I like instant gratification and so I want my cake in an instant!

    I make a double batch of all of the dry ingredients (first 5) and keep them in a jar. That way, anytime I want some cake, I just put two GIANT scoops in a mug, add 1TBS oil and 2 TBS warm water. Stir and microwave  : )

    Thursday, March 3, 2011

    Cinnamon Bun Pancakes

    Spring might be on it's way, but some days still feel like winter. How great would warm cinnamon rolls be on nights like that?! Oh, right, I forgot we don't have ovens....

    Not to worry! In celebration of March Flower Madness, my great friend Alissa sent me this recipe from the pioneerwoman.com. She said they were a "nice switch from the normal ol' pancakes!"

    Too bad my husband can't eat wheat... more for me!


    Cinnamon Bun Pancakes 


    • 1-½ cup All-purpose Flour
    • 3 Tablespoons White Sugar
    • ½ teaspoons Salt
    • 4 teaspoons Baking Powder
    • 1 Tablespoon Cinnamon
    • 2 whole Eggs Beaten
    • 1 cup Milk
    • 2 Tablespoons Corn Syrup
    • ¼ cups Butter, Melted
    • 1 Tablespoon Vanilla

    Preparation Instructions

    In medium bowl, combine flour, sugar, salt, baking powder and cinnamon with a whisk. Whisk well to make sure everything is combined.
    In separate large bowl, beat together eggs, milk, corn syurp, butter and vanilla. Stir in flour mixture.
    Heat a lightly oiled griddle or frying pan over medium/low heat. Pour about 1/4 cup batter onto griddle. Brown on both sides.
    Serve warm with icing drizzled over the top.

    Friday, February 25, 2011

    Carmel Corn

    Around Christmas I was feeling blue because I didn't have my oven to make all the normal Christmas goodies. "What could I make on the stove" I thought to myself. 
    "Aha! Caramel corn!" 
    And so I did. 

    I followed this recipe from allrecipes.com (also below).

    At first I used microwave popcorn, because that was what I had. However, uncooked popcorn, brown sugar, and corn syrup call all be easily found in Korea. 

    The recipe also says to bake the caramel corn for 1 hour. I just skipped that part  and went straight to eating it : ) 

    Ingredients

    • 1 tablespoon vegetable oil
    • 1 1/2 cups unpopped popcorn
    • 1 cup packed brown sugar
    • 1/2 cup butter
    • 1/4 cup light corn syrup
    • 1/2 teaspoon salt
    • 1/2 tablespoon baking soda

    Directions

    1. In a 4 quart saucepan, add 1 tablespoon of the oil , and heat over high heat. When oil is hot, add 1/2 cup of popping corn. Keep pan moving constantly. When corn stops popping, remove from heat. Place popped corn in oven to keep warm. Repeat until all corn has been popped.
    2. Preheat oven to 200 degrees F (95 degrees C).
    3. Boil sugar, butter, syrup, and salt for 5 minutes. Remove from heat, add baking soda. Stir well.
    4. Pour over popped corn. Spread onto cookie sheets and place in oven for 1 hour. Stir every 15 min. Remove from oven and let cool, breaking apart the popcorn as it cools. Store in air tight containers.

    As a side note, Koreans LOVE caramel corn. Want to get on the good side of your teachers? Take them some of this : )

    LinkWithin

    Related Posts Plugin for WordPress, Blogger...